Implementing time-based delays in Unity 3D

“simplicity is the ultimate sophistication”

– Leonardo da Vinci

Stack Overflow is a popular website for Unity developers to post questions about all things Unity-developing-wise. At the time of writing there is approximately 113,000 posts of which about 2,640 are concerned with my biggest hate in the Unity API – coroutines specifically WaitForSeconds().

The Unity coroutine API’s StartCoroutine() and WaitForSeconds() are two methods that when used together are a popular approach (usually by novices) for executing steps at specific times whilst a game is running.

First an example. Here the code is essentially implementing an orchestration to transform an object over a period of time, a rudimentary animation if you will:

void Start()
{
    StartCoroutine(DoStuff());
}

IEnumerator DoStuff()
{
    // Rotate 45 degrees
    transform.Rotate(new Vector3(45, 0, 0), Space.World);

    // Wait for 3 seconds
    yield return new WaitForSeconds(3);

    // Rotate 20 deg
    transform.Rotate(new Vector3(20, 0, 0), Space.World);

    // Wait for 2 seconds
    yield return new WaitForSeconds(2);

    // Move forward 50 metres
    transform.Translate(Vector3.forward * 50);
}

There are various problems with this approach:

  • Novices are given the false impression that Unity coroutines are magically executed behind the scenes and anything they do won’t impact the frame rate of the game. This is far from the truth as coroutines are multiplexd and executed over a series of frames and piggy-backed on the UI thread! So the frame rate is at the mercy of the bigest chunk of a coroutine’s step with the longest for-loop, slowest I/O operation or texture load
  • If used incorrectly (which is very easy to do) is akin to .NET’s Application.DoEvents() whereby your application can suffer from re-entrancy.1 Quite often I see developers reporting problems with their game exhibiting slow frame rates and using excessive memory. The cause is usually unguarded coroutine spawning. i.e. not checking whether the coroutine is already running. When this happens inside say Update() it is a recipe for disaster.  
  • It is a misuse of .NET’s IEnumerable and yield return pattern

On this last point, Cory Nelson on Stack Overflow says it best:

Developers do not expect iterating an IEnumerable to change a program’s state. It’s not what IEnumerable is intended for and is an inconsistent behavior with all of .NET.

What Unity is doing is using yield return as a pseudo-coroutine, and it’s going to cause confusion for any devs unfamiliar with that.

Cory Nelson, former developer at Microsoft, “Why shouldn’t I ever use coroutines?”, https://stackoverflow.com/a/35817077/585968

Alternative

In most cases the orchestrations need to wait for a time interval to pass before proceeding. The simplest approach, one that can be applied to whatever game engine you are using is to take note of the time at the beginning and then measure elapsed time since the start.

e.g.

private static float MyDelay = 1f; // One second
DateTime _start;


void Start()
{
    _start = DateTime.Now;
}

void Update()
{
    var elapsed = Now - _start;
    if (elapsed.TotalSeconds > MyDelay)
    {
        // do something
        _start = DateTime.Now; // Prepare for next interval
    }
}

If you are concerned with DateTime being too heavy you can use Environment.TickCount.

Here’s a helper class I like to use:

public class Delay
{
    private float _lastInterval;

    /// <summary>
    ///     The timeout in seconds
    /// </summary>
    /// <param name="timeout"></param>
    private Delay(float timeout)
    {
        Timeout = timeout;
        _lastInterval = Time.realtimeSinceStartup;
    }

    public float Timeout { get; }

    public bool IsTimedOut => Time.realtimeSinceStartup > _lastInterval + Timeout;

    public void Reset()
    {
        _lastInterval = Time.realtimeSinceStartup;
    }

    public static Delay StartNew(float delayInSeconds)
    {
        return new Delay(delayInSeconds);
    }
}

…and use it like so:

public class JetFighterHud: MonoBehaviour
{   
    private static readonly int DefaultUpdateFramesPerSecond = 15;
       
    [SerializeField] 
    [Range(1,60), Tooltip("How often the display is updated in frames/second")] 
    private int refreshRate = DefaultUpdateFramesPerSecond;

    private Delay _delay;

    private void Start()
    {
        _delay = Delay.StartNew(1f / refreshRate);
    }

    private void Update()
    {
        if (!_delay.IsTimedOut)
        {
            return;
        }

        // .
        // do all costly drawing here
        // .

        // Get ready for next period
        _delay.Reset();
    }
}

I also use it in my workflows for my flight simulator. Here’s an extract for a TakeoffWorkflow:

protected override void OnUpdate()
{
    if (!_stateMachine.IsTimedOut)
    {
        return;
    }

    //Tracer.Info($"{State}");

    switch (State)
    {
        case States.Idle:
            if (_stepDelay.IsTimedOut)
            {
                State = States.PreStartup;
            }

            break;

        case States.PreStartup:
            if (!_aircraftLightsManager.enabled)
            {
                _aircraftLightsManager.enabled = true;
                Tracer.LogInformation("NAV lights enabled");
            }

            if (_stepDelay.IsTimedOut)
            {
                State = States.Startup;
            }

            break;

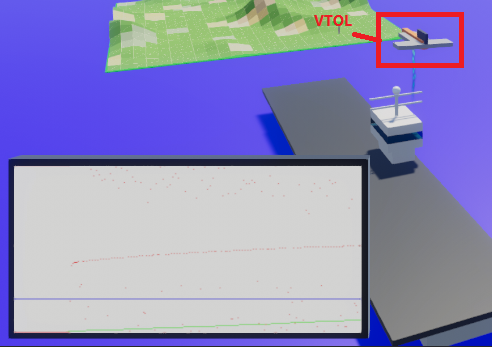
        case States.Startup:
            Vtol.SetActive(true);
            Tracer.LogInformation("VTOL active");

            _engineAudio.Play();
            _engineAudio.loop = true;
            _throttle = 0;
            Tracer.LogInformation("Engines on");

            State = States.StartingUp;
            break;

        case States.StartingUp:
            _throttle = Mathf.MoveTowards(_throttle, 1, 0.9f * Time.deltaTime);

            var shifted = Mathf.Lerp(0.5f, 1, _throttle);

            _pitchShiftSetting.Level = shifted;
            _pitchShiftSetting.Apply();
            if (_throttle >= 1)
            {
                _harrierThrusterAnimation.enabled = true;
                Tracer.LogInformation("Thrusters on");
                _stepDelay = Delay.StartNew(3);
                State = States.Started;
            }

            break;

        case States.Started:
            if (_stepDelay.IsTimedOut)
            {
                State = States.Taxi;
            }

            break;

        case States.Taxi:
            if (_stepDelay.IsTimedOut)
            {
                State = States.Takeoff;
            }

            break;

        case States.Takeoff:
            _vtolSoundFx.enabled = true;
            _altAutopilot.Engage = true;
            _exhaustRoot.SetActive(true);

            Tracer.LogInformation("ALT enabled");
            State = States.Climb;
            break;

        case States.Climb:
            break;
    }

    _stateMachine.Reset();
}

[1] This is a nasty condition typically in GUI applications whereby during execution of say CalculatePrimeNumbers_Clicked(), (an event-handler that takes a few minutes to run) in an act of desperation, the event handler calls Application.DoEvents() to preserve GUI responsiveness. Unfortunately Application.DoEvents() will process the message pump (remember we are already in the middle of a process step) and if the user happens to click the same button again then CalculatePrimeNumbers_Clicked()will again be invoked. It actually doesn’t matter what they click. This can lead to corruption of application state in exactly the same way as unsafe multithreaded code can.

Flight Sim Project Update

Just a quick update on the progress of my flight sim hobby project. After my work on autopilots I thought it would be fun to expand on it with other systems and see what’s involved in making a flight simulator.

First I improved the visuals slightly from a “blocky” plane to a low-poly plane, added particle effects and aircraft navigation lights.

Next I changed the render pipeline in Unity to the high-definition render pipeline (HDRP) and started to improve the aircraft models.

Next was collosion-detection. Whilst the body was quite easy the wheel collider documentation in Unity left much to be desired. With the colliders in place I needed to ensure that the wheels and struts moved realisticly when the invisible colliders did.

I added animation for the exhaust vents and turbofan, particle systems for the flame, navigation lights, altitude autopilot from before. I must say I’m pleased with how it turned out.

Daytime test:

Nighttime test:

PID controller-VTOL-throttle Integration for the Control of Force in Satisfying Autopilot-governed Altitudes in Phyics-based Simulations

In my prior post I mentioned the elegant nature of PID controllers as a means for implementing autopilots, in these posts I’ll be specifically talking about altitude autopilots.

I’ve made a few changes since my last post:

  1. the output of the PID is no longer tightly-coupled to the force equation
  2. new components such as Throttle and Thruster introduce an abstraction layer into the System. The Throttle naturally sits in-between the PID and Thruster
  3. the output from the PID is now clamped and normalised
  4. the normalised PID output is connected to the Throttle (also normalised) thus ensuring that the PID is only responsible for determining the amount of throttle
  5. while the Throttle instructs the Thruster the percentage to apply it is the role of the Thruster, given its knowledge of internal max thrust specifications, to both calculate and apply the force in Newtons to satisfy the autopilot

With this in place, the correct size (roughly), mass, max thrust can now be applied to the simulation.

In this video the altitude autopilot has been instructed to fly the visually-crude jet (modelled roughly after the Sea Harrier FA2) to a cautionary altitude of 50 m (164 ft). It does so via a PID which determines how much error exists between the PV (process variable or “current altitude”) and the SP (setpoint or in this case the “desired altitude”).

Low altitude test. Since the error is low, the System takes an anti-aggressive approach to reach the target.

The clamped and normalised error output is connected to a throttle which in turn controls the jet’s VTOL engines by applying the value against the thrust range of the engine, in this case 97 kN, more than enough to lift the model with a mass of 8,000 kg being simulated here.

Near the end of the video you can see a 80.9% throttle being applied; this generates 78,470 N which is exactly the amount to counter gravity for this model.

Note: though drag is being simulated airfoil surfaces and lift are not

In this video the altitude autopilot has been instructed to fly the jet to an altitude of 100 m (300 ft). The slight overshoot at the start is mostly likely due to an over-eager integral term – something I’ll fix one day.

Due to a much higher error, the System exhibits a more aggressive approach with the throttle and reaches the target quite well

PID Controllers and their Elegant Approach for Implementing Autopilots in Phyics-based Games

Overview01I’ve been working on a new hobby game based on elements of the classic 80s game Carrier Command.  For the uninitiated this game sees you in charge of an aircraft carrier at war with an enemy in a local archipelago.  With your arsenal of AI-controlled VTOL aircraft and amphibious units your role is to capture the islands and convert them to friendly bases.  Apart from being highly addictive and fun any programmer would appreciate the technical aspect of the game particularly implementing the AI-controlled units and autopilots.

One of the first things I began to work on was the altitude autopilot.  With it the VTOL AI could take off and automatically fly to a pre-determined altitude.  My first approach was perhaps a little naïve being too “mechanical” in nature and not particularly accurate so I put it on hold for a while.

At some point I came across the PC game Stormworks which allows you to design and drive your own vehicles including custom microcontrollers. By learning the game’s various ways one can implement say heading autopilot on a boat, I graduated from a rudimentary:

If the target is to the left then 
    turn left by some scaled amount  
else if to the right then 
    turn right by some scaled amount

…form that tended to oversteer to something I’ve not heard of before but is common in the world of servo controllers and industrial control systems – PID controllers.

A proportional–integral–derivative controller (PID controller or three-term controller) is a control loop mechanism employing feedback that is widely used in industrial control systems and a variety of other applications requiring continuously modulated control. A PID controller continuously calculates an error value {\displaystyle e(t)}e(t) as the difference between a desired setpoint (SP) and a measured process variable (PV) and applies a correction based on proportional, integral, and derivative terms (denoted P, I, and D respectively), hence the name. Tell me more

Essentially a PID looks at where it currently is in terms of error, where it has been over time and a best estimate for the future [1]. It is the continuous feedback that makes PIDs great compared to other techniques that are simply reacting to a particular moment in time. Better still PIDs only take a few lines of code!

Image courtesy of Wikipedia [1]

Let’s see how this operates in action. The first image below, the VTOL situated on the deck of the aircraft carrier is beneath the desired altitude of 30 m.

  • The blue line represents the desired altitude
  • Green line represents current altitude
  • Red represents the current error or the raw value that is fed into control systems, in my case the vertical thruster that raises the aircraft.

This image shows the VTOL has reached the desired altitude and the PID is rapidly reducing output so as to avoid overshooting.

Eventually things stable out. Regular puffs from the thruster are needed to counter the effects of gravity, as can be seen by the red blips below:

As mentioned, there’s not much too it code-wise, here is a section from my PidController class:

var Kp = _settingsData.Kp; // error
var Ki = _settingsData.Ki; // past values compensator
var Kd = _settingsData.Kd; // best estimate of future trend

var error = SetPoint - PV;
_integral += error * dt;
var derivative = (error - _previousError) / dt;
Output = Kp * error + Ki * _integral + Kd * derivative;
_previousError = error;

Output is a public property which I access from my main VtolAutopilot in order to apply forces to the rigid body. It’s important to clamp any values from the PID so as to match the characteristics of my thruster.

var o = _pidController.Output;
var output = Mathf.Clamp(o, _minForce, _maxForce);
if (output == 0)
	return;

_rigidBody.AddForce(0, output, 0);

Update: I no longer directly connect the PID output into the force equation as you’ll see in my next post.

Citations

1. https://en.wikipedia.org/wiki/PID_controller

Unit Tests Measure Health But Only nDepend Measures Quality

Often times in the development of software, it is important to know the health of a system at certain milestones.  These generally take the form of developer-led unit tests, tests run on nightly builds of CI servers or automated or manual tests lead by test personnel.  Though these tests serve to show the operational state of a system to measure the level of undesirable traits, they don’t really indicate how well a system is constructed.  By this I mean:

  • were coding guidelines followed?
  • are multiple classes per file?
  • are there any methods too large?
  • are there any parts of the code that is too complex?
  • are there any methods with too many parameters?
  • are there any classes with excessive methods?
  • is the UI layer directly using DB types?
  • is there a sign of partitioning the code base through many small assemblies?

The answers to these questions not only impacts the immediate code base but also medium to long term maintenance of a system. There is an immediate concern because the system is in the process of being built and there might be cases where new developers are brought on board to help out.  Problems with the code hinders not only immediate development but also future maintenance.   Philosophies such as "YAGNI” or “just ship it” are detrimental to the quality of the code and not particularly mindful to future coders who must return to it in the future.

The popularity of code reviews serves to address many of the questions posed above but often times such reviews are subjective, instigate debate, the playing of many trump cards and conclude in an unsatisfying work by the part of the author who merely had noble aspirations to the business.

At a company I once worked for, I had a code review where the reviewers claimed that my work was more complex.   Luckily I knew about static code analysis tools and a measurement called cyclomatic complexity (CC).

Cyclomatic complexity is a software metric used to indicate the complexity of a program. It is a quantitative measure of the number of linearly independent paths through a program’s source codeWikipedia

Each method’s if, while, for, foreach, case or continue statements contribute to the number of CC and the number should be under a certain threshold.

Through tooling I was able to show that not only were my changes under the CC threshold but it had actually reduced it from what the code base had before.   The tool was able to remove subjective opinion from the equation, convince my peers and my code passed review.  Such a tool is nDepend and it does a lot more than settle code review debates.

nDepend

nDepend is a static code analysis tool that can either run as a stand-alone app, integrated with Visual Studio or run from the command-line on build servers.  nDepend comes out-of-the box with many useful analysis tools to measure the quality of your codebase.  If you have ever played with the Code Analysis feature in Visual Studio you will understand the concept, however nDepend goes much further.

nDepend stand-alone application:

ndepend 01

nDepend running in Visual Studio.  nDepend creates its own .ndproj files that can be optionally attached to the .sln or the users file depending on whether everybody has a copy of nDepend or not.  After analysing a solution nDepend can show a dashboard showing the current and historical analysis results.  Here you can see that I have nDepend analysing an old Raytracer solution of mine. It’s a single project experimental app but you can see that there are some issues in creating an app this way.  I have two analysis sessions but because there’s been no changes no deltas are shown and the chart is flat.

ndepend vs 01

Everything in the dashboard is clickable.  Clicking the red “3” under Rules.Critical we see:

VSCriticalRules

…specifically:

criticalrules01

Double-clicking Avoid methods too big, too complex I can drill down-into which methods are causing this issue:

Methods too big

Finally double-clicking an entry jumps to the source code.  Very handy!

shade

Rules

nDepend analyses your code via rules written in a LINQ-looking language called Code Query Language or CQLinq.  Rules are grouped by category and can be optionally disabled if you so desire.  nDepend allows you to write your own rules which becomes very useful later during CI server builds and even gated check-ins.

API

Apart from determining whether code is violating certain rules or not, CQLinq is also useful to extract information from the code base.  For example you might want to determine requirement implementation coverage in a project’s code base.  nDepend allowed us to do just that by having the testers flag parts of their code with certain requirement markers that we were able to then extract via the nDepend API in a tool of our creation.  This gave us an accurate view of not just how development is progressing but also how complete tests were.  For businesses following application lifecycle management (ALM) processes this was a brilliant feature.

Visualisation

This is an area where nDepend really shines.  It includes many highly useful and informative graphs that can quickly indicate problems or assist in the understanding of a system’s structure.  One such graph is the Code Metrics View.  This view can then show specific flavours such as Cyclomatic Complexity (both source code and IL), # Methods, # IL Instructions and more.  For the CC view we can see the relative sizes of methods (box size) and CC (colour).  This highlights an important point – just because a method may have a large number of lines doesn’t necessarily mean it will have a large CC or vice versa.  The MainForms’s InitializeComponent is relatively large at 283 lines but because there few paths through the method (actually only 1) it has a low CC.

Conversely, my Raytracer’s Shade() method has 51 lines and a high CC 13.  The Screen() method right next door (same size box) has 48 lines at 7 CC.

CM View 01

I just love the tooltips in nDepend.  They are very rich with lots of useful information.

Shade tooltip

nDepend also has a suite of Dependency Graphs that allows you to visualise the structure of your system in many ways.

aircon dependency graph

One of the more interesting graphs is the Dependency Matrix, a view that is very important for highlighting any architectural problems with your code with respect to say circular dependencies or tight-coupling.

Depend Matix 01

Historical Analysis

As mentioned, nDepend can display historical analysis and additionally compare the current state of the code with prior baselines.  This gives a strong and immediate indication as to whether the quality of the code is improving or not.   It is certainly strong evidence that should be used in any code review.

Conclusion

nDepend is an extraordinarily powerful tool that should be part of any due-diligent developer’s toolbelt. It’s approach to static code analysis is unrivalled, certainly in its ease of use and richness of presentation.  It has considerable more features than what is described here.  I urge you to try out their demo and point it at your own projects.  You may be shocked at what you might find.

Disclaimer:  the author was provided a copy of nDepend for the purpose of this review.

Have you unit tested that aileron servo?

Unit testing has become a religion. The more a system is replaced with impostors just for the sake of testing convenience and timeliness, the lower the level of usefulness such results have when reporting to stake-holders.

Testing with a database is integration testing and one does not mock-out an airplane aileron when testing a flight management computer just because the aileron’s servos are slow!

Developer De-skilling and the Fast Food of Software Development

In the beginning, anyone who wanted to be around a computer generally wore a white coat and had several letters after his surname.  Over time and with each generation the need for programmers to be part of a secular order; to punch peculiar tiny holes onto small flat pieces of cardboard has no longer been as important and has freed people up so that they may instead fixate over purchasing small electronic devices for the purpose of making phone calls, only to buy a new model the following year.  Which is odd when you think about it since no one really buys these small device for making phone calls but I digress.

In the early years, at least from my experience, you really had to know your stuff as a c/c++ developer.  There was no Internet (at least we had access to);  no Google to find things at a touch of a button;  no open source library let alone open-source system or sub-system that you could plonk willy-nilly into your project.  What we did have were books?  Ah books.  Lovely smelling finger-loving hard-bound tomes of awesomeness.  Didn’t know something?  Look it up.  I fondly remember the wonderful set of Windows 3.0 API and Microsoft MFC volumes.  I read the reference manual from beginning to end.  I could not wait to try out something I had learnt.

As I mentioned, we didn’t use open source – such a concept did not arise in the Windows world at least in my travels until everyone had pretty much committed to c#.  I’d say everyone in our team were equally skilled and we had great team-work. Prior to that – need a database? Hire a DBA.  Need to learn DCOM?  Buy that Wrox book.  Embedded system?  R&D.

Today I find it’s all rather changed where the need for creating a software sub-system is replaced with an order to source a pre-fabricated; unknown; un-tested; potentially toxic foreign body and plug it into our developing system.

  • No sooner as a need arisen for hosting multiple .NET services into a single system as someone says “get a open-source project”
  • Need a reliable messaging system?  Better down-load that open-source bus project that has been stagnant for the past 24 months
  • Need a plug-in system?  Well you better use MEF then
  • Don’t have time for a nutritious home-cooked meal with ingredients your purchased?  Better buy that burger at the drive-thru then

Now, I can understand that time spent rolling our own equivalent to the above may be better suited to fulfilling the immediate demand as put by the project requirements.  That’s a valid point so long as measure the time spent rolling your own relative to the time spent developing the entire project.  If you’re going to incorporate someone else’s system, you should ideally quarantine the foreign system and subject it to the same level of software testing your company does.  I suspect you don’t and you would not be alone.

I only this week threw the c++ DICOM open source testing project DVTk into the bin.  It had more memory leaks than atoms in my Miss Piggy coffee cup.  It’s rather embarrassing really when you consider the API is meant for a testing software.  Ooops!

Plus and more importantly, pre-fab software sets a dangerous precedent where if left unchecked, developers would be largely nothing more than systems integrators with little knowledge how the disparate foreign sub-systems operate nor of the overall quality of said sub-systems; where all the substantial; complex and low-level development has been done by someone else.

One has only to look at some of the questions on StackOverflow.

Only this week someone was asking:

“how do I make a progress bar for my UI”.

Nothing wrong with that until you learn the author is wanting to make a game in Unity 3D no less.  I’m pretty sure making a game has a high requirement that a developer be skilled graphics-wise.  If you can’t make a progress bar then you should not be making a game.  To not to be able to do so when you’re using a 3rd party game engine – something that is responsible for a measurable and significant amount of foundation is just the more embarrassing.

This is what the world of pre-fabbing has come to.  What is even more amazing is that even in this world of instant-satisfaction Googling, some people are have trouble clicking that search button on their web browser because they are too busy looking at their shiny phone or new age digital watch.  Unable to spend time with Google or AskJeeves to perform any form of research or let alone pick up a book.

The other danger of course failure in backward-compatibility or failure as a result of a combination of 3rd party system interaction of a 3rd party system or systems or platform in the future.

  • Making a control for Google Chrome using their proprietary control technology?  Let’s hope they don’t remove it as a feature. Oh wait they just did
  • Not too long ago, many firms were utilising Flash in their web sites but iOS; and the continual desktop security issues eventually saw to the demise of the once popular juggernaut
  • Using AnglularJS?  Can you bet your guinea pig’s life that AJS won’t be incompatible with browsers in 5 years time?
  • Can you say for 100% certainty that HTML5 won’t be replaced with something else?
  • Can you say with confidence that the contributors to say AJS won’t ditch it for something new

But wait I hear you say – it’s open source, we can just download the source code and maintain it.  Perhaps, assuming of course that the skill set of the developers are up to the task and more importantly management will allow you to spend considerable resources in an attempt to first comprehend the 3rd party system; then make the necessary changes.

In some ways, even using a web browser is essentially a 3rd party open source ever changing, widely-unpredictable development platform.  Is it really necessary for your next project to be browser-based?  Particularly if its for an intranet.

Think twice before you use that open-source project.

n-Body Galaxy Simulation using Compute Shaders on GPGPU via Unity 3D

Galaxy

Following on from my prior article about GPGPU, I thought I try my hand at n-Body simulation.

Here’s my first attempt at n-Body simulation of a galaxy where n equals 10,000 stars with the algorithm running as a compute shader on the GPU.  Compute shaders are small HLSL-syntax-like kernels but can run in massive parallel compared to a regular CPU equivalent.

It’s important to remember that conventional graphics including those in games, do not use GPGPU for star fields.  Generally this is accomplished by either manipulating the star coordinates CPU-side and uploading to the GPU every frame or so; or utilise a small shader that renders a pre-uploaded buffer of stars that may or may not move over time.  In any event, it would be unlikely to perform n-Body simulation using conventional non-GPGPU means due to the slow performance.

My simulation entails n2 gravity calculations per frame or 10,0002 = 100,000,000 calculations per frame at 60 frames per second – something that is quite impossible if I attempted to do it from the CPU-side even if the GPU was still rendering the stars.

Here’s the compute kernel (note I’m hosting the Gist on GitHub as a “c” file in order to display syntax hi-lighting.  Readers should be aware the correct file extension is .compute):


// Copyright 2014 Michael A. R. Duncan
// You are free to do whatever you want with this source
//
// File: Galaxy1Compute.compute
// Each #kernel tells which function to compile; you can have many kernels
#pragma kernel UpdateStars
#include "Galaxy.cginc"
// blackmagic
#define BLOCKSIZE 128
RWStructuredBuffer<Star> stars;
Texture2D HueTexture;
// refer to http://forum.unity3d.com/threads/163591-Compute-Shader-SamplerState-confusion
SamplerState samplerHueTexture;
// time ellapsed since last frame
float deltaTime;
const float Softening=3e4f;
#define Softening2 Softening * Softening
static float G = 6.67300e-11f;
static float DefaultMass = 1000000.0f;
// Do a pre-calculation assuming all the stars have the same mass
static float GMM = G*DefaultMass*DefaultMass;
[numthreads(BLOCKSIZE,1,1)]
void UpdateStars (uint3 id : SV_DispatchThreadID)
{
uint i = id.x;
uint numStars, stride;
stars.GetDimensions(numStars, stride);
float3 position = stars[i].position;
float3 velocity = stars[i].velocity;
float3 A=float3(0,0,0);
[loop]
for (uint j = 0; j < numStars; j++)
{
if (i != j)
{
float3 D = stars[j].position – stars[i].position;
float r = length(D);
float f = GMM / (r * r + Softening2);
A += f * normalize(D);
}
}
velocity += A * deltaTime;
position += velocity * deltaTime;
if (i < numStars)
{
stars[i].velocity = velocity;
stars[i].position = position;
stars[i].accelMagnitude = length(A);
}
}

view raw

GalaxyCompute.c

hosted with ❤ by GitHub

Here’s my Unity MonoBehaviour controller that initialises and manages the simulation:


#region Copyright
// Copyright 2014 Michael A. R. Duncan
// You are free to do whatever you want with this source
// File: Galaxy1Controller.cs
#endregion
#region
using Assets.MickyD.Scripts;
using UnityEngine;
#endregion
public class Galaxy1Controller : MonoBehaviour
{
private const int GroupSize = 128;
private const int QuadStride = 12;
#region Fields
/// <summary>
/// The galaxy radius
/// </summary>
/// <remarks>This will appear as a Property Drawer in Unity 4</remarks>
[Range(10, 1000)]
public float GalaxyRadius = 200;
public Texture2D HueTexture;
public int NumStars = 10000;
public ComputeShader StarCompute;
public Material StarMaterial;
private GameManager _manager;
private ComputeBuffer _quadPoints;
private Star[] _stars;
private ComputeBuffer _starsBuffer;
private int _updateParticlesKernel;
#endregion
// Use this for initialization
#region Properties
private Vector3 StartPointA
{
get { return new Vector3(GalaxyRadius, 0, 0); }
}
private Vector3 StartPointB
{
get { return new Vector3(-GalaxyRadius, 0, 0); }
}
#endregion
#region Methods
private void CreateStars(int offset, int count, Vector3 T, Vector3 V)
{
for (var i = offset; i < offset + count; i++)
{
var star = _stars[i];
star.color = Vector3.one; // white
star.position = Random.insideUnitSphere*GalaxyRadius + T;
star.velocity = V;
_stars[i] = star;
}
}
private void OnDestroy()
{
// must deallocate here
_starsBuffer.Release();
_quadPoints.Release();
}
private void OnDrawGizmos()
{
Gizmos.color = Color.yellow;
Gizmos.DrawWireSphere(transform.position, GalaxyRadius);
Gizmos.DrawWireSphere(transform.position + StartPointA, GalaxyRadius);
Gizmos.DrawWireSphere(transform.position + StartPointB, GalaxyRadius);
}
private void OnRenderObject()
{
if (!SystemInfo.supportsComputeShaders)
{
return;
}
// bind resources to material
StarMaterial.SetBuffer("stars", _starsBuffer);
StarMaterial.SetBuffer("quadPoints", _quadPoints);
// set the pass
StarMaterial.SetPass(0);
// draw
Graphics.DrawProcedural(MeshTopology.Triangles, 6, NumStars);
}
private void Start()
{
_updateParticlesKernel = StarCompute.FindKernel("UpdateStars");
if (_updateParticlesKernel == -1)
{
Debug.LogError("Failed to find UpdateStars kernel");
Application.Quit();
}
_starsBuffer = new ComputeBuffer(NumStars, Constants.StarsStride);
_stars = new Star[NumStars];
var n = NumStars/2;
var offset = 0;
CreateStars(offset, n, StartPointA, new Vector3(-10, 5, 0));
offset += n;
CreateStars(offset, n, StartPointB, new Vector3(10, -5, 0));
_starsBuffer.SetData(_stars);
_quadPoints = new ComputeBuffer(6, QuadStride);
_quadPoints.SetData(new[]
{
new Vector3(-0.5f, 0.5f),
new Vector3(0.5f, 0.5f),
new Vector3(0.5f, -0.5f),
new Vector3(-0.5f, -0.5f),
new Vector3(-0.5f, 0.5f),
});
_manager = FindObjectOfType<GameManager>();
}
private void Update()
{
// bind resources to compute shader
StarCompute.SetBuffer(_updateParticlesKernel, "stars", _starsBuffer);
StarCompute.SetFloat("deltaTime", Time.deltaTime*_manager.MasterSpeed);
StarCompute.SetTexture(_updateParticlesKernel, "hueTexture", HueTexture);
// dispatch, launch threads on GPU
var numberOfGroups = Mathf.CeilToInt((float) NumStars/GroupSize);
StarCompute.Dispatch(_updateParticlesKernel, numberOfGroups, 1, 1);
}
#endregion
}

Censorship on Planetary Annihilation Steam Forums?

Planetary Annihilation (PA) from Uber Entertainment (UE) is an Early Access title on Steam currently available for purchase for $59.99 USD.  Early Access means that one can buy the game now even though it is not finished with the notion that one is supporting the devs in their endeavours.   In other words the title is pre-alpha.  This can be a good or bad thing and for the complete run-down I recommend listening to TotalBiscuit’s discussion on Early Access.

I’ve been looking over the PA forums hosted on Steam trying to become a little more informed about this interesting title; a title which was tempting me to open my wallet and let the moths fly free. Sadly I was only to discover a disturbing pattern of arguably fascist censorship by the powers that be of anything negative that people have said or even requesting features that are not aligned with the current agenda[4]. Most authors are expressing their concerns over the price of the title [1] [2] [3].

Now I’ve not encountered anything like this since perusing Bohemia Interactive forums – specifically ARMA xx or Carrier Command Gaia Mission where many a poor chap would be banned; or a thread locked should one sneeze or forget to pay homage to the sacrificial guinea pig.

One thread on Steam got locked for asking for a OS compatibility feature. Did I mention there were only five (5) posts in the thread. [4] So much for an open discussion.

Steam Green Light clearly states:

image

Uber Entertainment states on the Steam Early Access Game notice:

image

It seems the benefits of an Uber Entertainment (UE) Early Access relationship are clearly one-way and quite arrogant at that; at least that is the perception established by the UE Steam moderators. The suppression of any negative discussions only serves to raise suspicion. It is quite possible that the UE moderators on Steam are not on the same level of professionalism as UE proper; if so UE could perhaps consider reiterating company policy with all those that represent it.

I for one shall take no part in the Early Access. I think I shall wait patiently for the game’s release where upon I hope to buy should the title prove worthy.

I wish them the best of success until then.

[1] “Came back to check on this old game. Lmao @ the price again.”, http://steamcommunity.com/app/233250/discussions/0/648817378131765891/

[2] “to much money”, http://steamcommunity.com/app/233250/discussions/0/648817378087864723/

[3] “I just bought PA and I feel cheated”, http://steamcommunity.com/app/233250/discussions/0/648814844869954342/

[4] “I will buy it if developers add Windows XP compatability”, http://steamcommunity.com/app/233250/discussions/0/648816742617053191/

[5] “The Minecraft Beta was $5….”, http://steamcommunity.com/app/233250/discussions/0/648814845030059149/