XNA Cruiser? One “Bump” or Two?

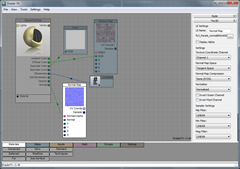
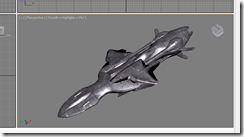
I just love pipelines and Lumonix Shader FX makes no exception.  Yesterday I started off with a rather humble shader but today let’s beef it up a bit with a bump map to give it more of a 3-D look.  Here is the shader as seen in 3DS Max and Shader FX:

image

…and here it is in my space simulator:

image

That’s looking a bit better, though I must admit it needs a bit of colour and perhaps some glass effects – something for a future project. We noobies have to start somewhere.

Be Gone Wireframe – Hello Space Cruiser!

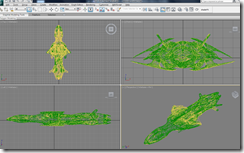
Vanquish 2010-11-27 15-44-45-87Today I spent time on my scene mechanics and imported a new space ship model to replace the test ring place-holder that I was using for the autonomous steering behaviour programming.  It served it’s purpose by indicating the steering, velocity and normal vectors but I know those around me were wanting to see a spiffy model. Anyway I found a rather nice free 3DS model by Mace24de (thanks buddy) on TurboSquid. Loading this into Max it was just a case of giving it a good paint job via Lumonix Shader FX via an interactive pipeline building process. Gotta love Shader FX. 

image

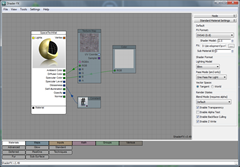
As you recall in a previous post, Shader FX is a must have for the generation of HLSL GPU shaders in the form of .FX files for use in the likes of XNA.  I’ll just do something fairly simple for now though – a diffuse texture map with a touch of glossiness should be a good start.  Later I’ll plonk in a normal map to make it more interesting.  Here’s a shot of Shader FX in 3DS Max.

image

…now let’s apply that to our model via Tools/Apply to Selection in Shader FX:

image

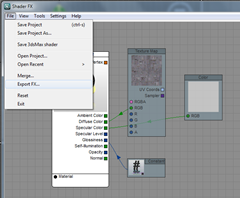
That’s more like it. Now let’s export the shader for XNA. In Shader FX choose File/Export FX…

image

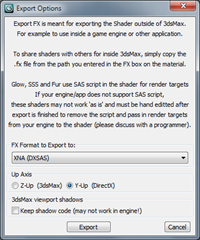
Select XNA from the appearing dialog.  Make sure you pick Y-Up too – that is a requirement for XNA.

image

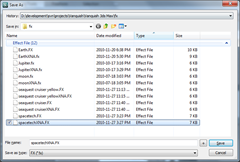
Remember that the XNA shader must be a different filename to the one being used in 3DSMax.  I like to merely give the XNA files a “XNA” suffix.  A no brainer Winking smile

image

…export your model. Make sure just your model is selected, no lights/cameras/etc. please unless your pipeline can handle that. Choose File/Export/Export Selected in 3DSMax:

image

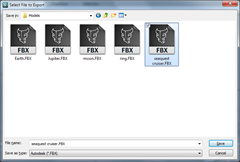
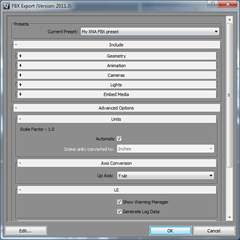
Export as a FBX using Autodesk’s FBX export tool (its a free download from their site). My settings is pretty much the defaults except I’ve deselected cameras, animations etc. for now as I can’t handle them anyway). We don’t want cameras or lights because we’ll be doing that in game.

image

Eventually this gets into my game using my custom content importer pipeline for FBX that reattaches textures, FX etc. to achieve the following result. I only have to include the .FBX file in my Visual Studio project – there is no need to directly specify the FX, textures or other files because my custom pipeline finds them by reading the info in the original FBX file.  This is handy because I can leave shared art on a different drive and use it in other projects.  Yippee!

Here we are just to the side:

Vanquish 2010-11-27 15-31-53-11


Coming in for the kill!

Vanquish 2010-11-27 15-44-45-87


From above:

Vanquish 2010-11-27 15-47-24-01

Tutorial: Watch Your XNA Bounding Volume

UPDATE: Thank-you for making this the most popular of my posts 🙂

When the number of models in your scene reaches a certain value you will notice a dramatic drop in rendering performance.  This is true regardless whether it is online or offline rendering and the same is true for XNA. The problem is that by default your 3D engine is rendering objects that you can not see – objects that are behind you for example.

Luckily there is something known as a bounding volume.  Now you may have heard of bounding volumes with regards to collision detection but bounding volumes can also be used to determine whether to draw a model.  The bounding volume is sort of like an invisible object that is just big enough to encompass the model it is assigned to. In computer graphics, bounding volumes can be many things including:

  • spheres
  • axis-aligned boxes
  • model-aligned boxes
  • a combination of the above

A lot of work went into bounding volumes in the early days of offline renderers, particularly ray tracers. The idea is that for each model in your scene you enclose it with at least one bounding volume. To really reap the benefits it is recommended to assign a hierarchy of bounding volumes to your model depending upon the complexity – particularly for collision detection.  Then when it is time to render the scene, it is a rather trivial exercise to determine whether to draw the model by testing whether the model’s bounding volume intersects the camera viewing frustum (below). [1][2]

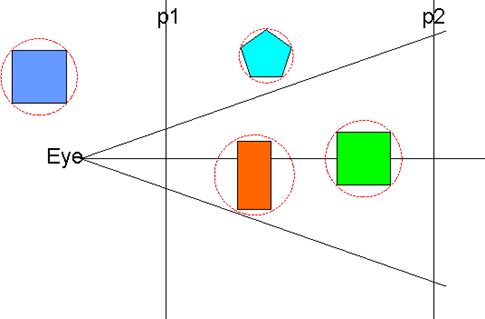
In the figure below we can see that the orange and green boxes will be rendered because their bounding volumes (in this case spheres) are inside the viewing frustum (the trapezium defined between the p1 and p2 near and far clipping planes respectively).  The pentagon and baby blue square will be culled since they are above or behind the eye.

image

In this example all the bounding volumes are spheres, which while adequate for most of the shapes below is perhaps not quite sufficient for the orange box.  There is excess lateral space which will lead to premature culling and object collision.  This is demonstrated in this dramatic video clip below where you can see buildings popping in and out of existence!  All the buildings in this scene are each enclosed with a bounding sphere.  You will note the buildings prematurely vanishing at the bottom of the window.

In XNA, the default shape for a bounding volume is the bounding sphere, which as I mentioned is quite sufficient so long as your model’s x:y:z ratio is equivalent or that there are no major extremities – such as arms and legs.  A better approach for my building example above is to use a bounding box rather than a bounding sphere. Unlike spheres, boxes are subject to alignment issues, but since my building is already axis-aligned I got away with a bounding box whose alignment matches the word axis.  If say my building was tipping over because an invisible brontosaurus bumped into it, then I would need to use model-aligned bounding-boxes – a touch more expensive computation wise.

So in this example, I chose to use bounding boxes over spheres.  Note my buildings during this run remain in the universe much to the relief of my tenants. Or was it that there were no brontosauruses?

Strangely, XNA has no default support for bounding boxes for your models only spheres.  If you want the bounding box you will need to calculate it yourself by enumerating the model’s meshes.  Luckily, jwatte has published this XNA c# source code for calculating the bounding box volume in the XNA forums.  Thank-you thank-you!

Depending on your model and needs, spheres might be sufficient for you so long as you are modelling the creature from the film Dark Star.  For anything else, give bounding boxes a try!   Bounding boxes go well with brontosauruses too!

image

———————-

[1] Arvo, J., Kirk, D., A Survey of Ray Tracing Acceleration Techniques, An Introduction to Ray Tracing, Academic Press, 1989.

[2] Pharr, M., Humphreys, G., Primitives and Intersection Acceleration, Physically Based Rendering, Elsevier, Morgan Kaufmann Publishers, 2004

Tutorial: On the Fly Effect, Material and Model Mapping

UPDATE: be sure to check out my YouTube channel where you can see live-action of content such as this article as well is other subjects.


By using a ModelProcessor custom content pipeline processor you can import 3D assets and automatically have the XNA Model class linked to the appropriate textures and HLSL FX code.  No more individual code for loading effects, models and no more horrid manual mapping (or should I say re-mapping) of effects to models mesh parts.

LoadContent() now looks as clean as:

_stoneyBox = Content.Load<Model>(“models/stoneybox”);


So How is This Done?

In the case of FBX file formats, there is a wonderful amount of metadata that is sadly being ignored by our old friend BasicEffect and the standard model import pipeline.  By doing some of our own magic we can access this data and automatically connect shaders, textures and models together.

Add your model to your Content folder, this should be a FBX, at this stage X does not not seem to have all the smarts in it.

Right-click your Solution and choose Add.New Project…

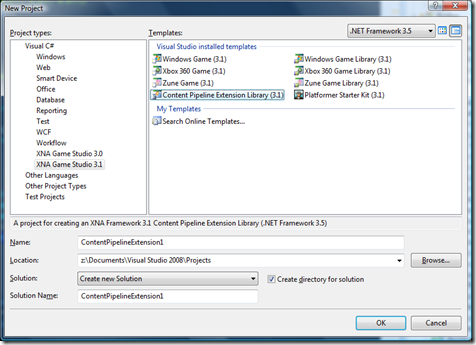
Then in the appearing window, select Content Pipeline Extension Library and do the usual filename stuff, adding it to your solution.
image

This will create a new project with a default class.  Delete what is there and replace with something like the following.

[ContentProcessor(DisplayName = “Custom Effect Model Processor – MickyD”)]
public class CustomEffectModelProcessor : ModelProcessor

{

protected override MaterialContent ConvertMaterial(MaterialContent material, ContentProcessorContext context)
{
EffectMaterialContent myMaterial = new EffectMaterialContent();

if (material is BasicMaterialContent)
{
Log(context, “Material is basic”);

// do appropriate basic stuff here
}
else if (material is EffectMaterialContent)
{
EffectMaterialContent effectMaterialContent = (EffectMaterialContent) material;

//
// remap effect
//
myMaterial.Effect = new ExternalReference<EffectContent>(effectMaterialContent.Effect.Filename);

// textures
foreach (KeyValuePair<string, ExternalReference<TextureContent>> pair in effectMaterialContent.Textures)
{
string textureKey = pair.Key;
ExternalReference<TextureContent> textureContent = pair.Value;

if (!string.IsNullOrEmpty( textureContent.Filename))
{
myMaterial.Textures.Add(textureKey, material.Textures[textureKey]);
Log(context, “Set texture ‘{0}’ = {1}”, textureKey, textureContent.Filename);
}
}

}

return base.ConvertMaterial(myMaterial, context);
}

Compile your solution making sure everything is fine. OK, now we have a custom pipeline in the solution but nothing is actually using it yet.  We do have that FBX we added before, wouldn’t it be schmick to have it use the pipeline?

Well first we need to add a reference to the pipeline project to our main project.  Once done we get a cool new drop-down option on model’s Content Processor property.  In your main project, right-click Content (NOTE it’s the Content references we want NOT project references), choose Add reference and add a reference to your pipeline project on the Projects tab.
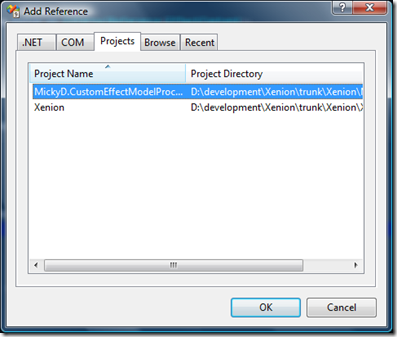
image

If all goes well it should look something like this:
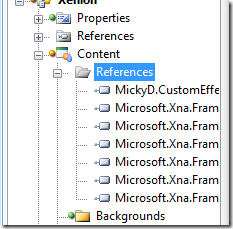
image

Back in your main project (the one with your Content folder holding your assets anyway), right-click your FBX model to bring up the Properties window.  If you look there should be a new choice in the Content Processor field. Fill it out as follows with particular attention to:

  • Content Processor = (whatever your custom effect model processor is)
  • Generate Tangent Frames = true
  • Scale = … (depends on your model)
  • Swap Winding Order = true EDIT: actually leave this to false
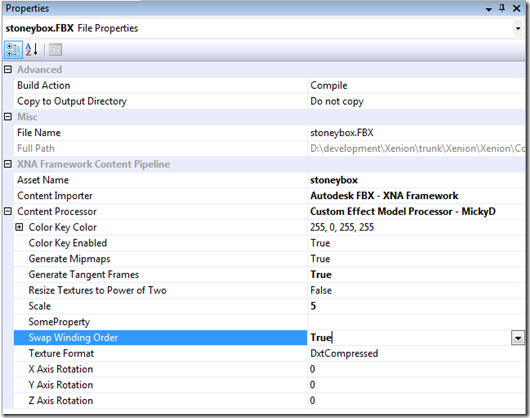
image

Now we can load the model in our LoadContent() as follows:

_stoneyBox = Content.Load<Model>(“models/stoneybox”);

Note though that we still need a reference to the effect so that we can pass parameters.  (unless of course your shader has none)

_stoneyEffect = _stoneyBox.Meshes[0].Effects[0];

Note this is the complete reverse of the usual tutorials – which load the model AND effect and then re-apply the effect to the model!

In my draw function I do need to pass though the light position.  I guess if it wasn’t moving (which it wasn’t) I could just do it during LoadContent().  Oh well.

_stoneyEffect.Parameters[“light1Pos”].SetValue(light1Pos);

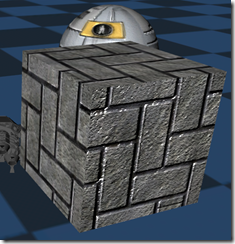
Here you can see our friend the cube, but with a:

  • diffuse texture map
  • normal bump map
  • diffuse color
  • specular highlights

image

And here’s a shoot of a few buildings.  Each building is a single FBX model with multiple FX (or materials) in XNA (glass, bricks, tar roof)
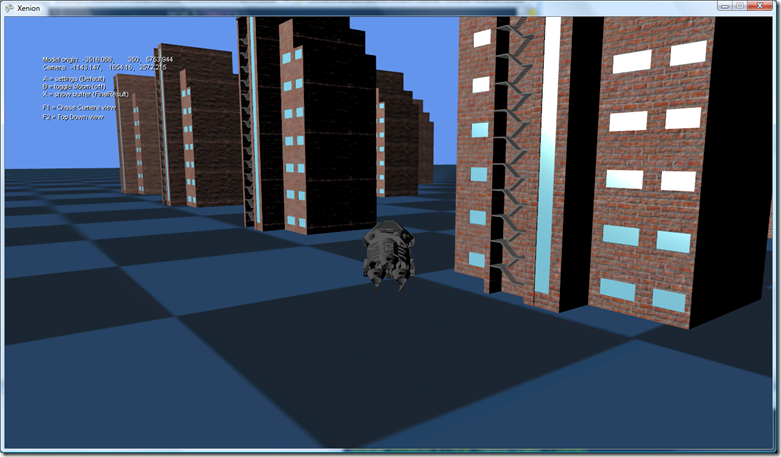
image

That’s it.  With this technique, there is minimal code required to load your models with the correct textures and effects.  What’s more it is only necessary to add your model to your project – not the textures and effects.  I like to export my models out of 3DS Max directly into my Content/Models folder.  I don’t tell Max to export the textures but rather have it just put the path into the FBX so that the pipeline can load my textures directly out of material library folder at compile time.  This works for me, but understandably it may not suit others.  That is fine.


EDIT: The draw code for drawing a XNA model with one or more custom effects is as below:

/// <summary>
///     Draws the with custom effect.
/// </summary>
/// <param name = “model”>The model.</param>
/// <param name = “world”>The world.</param>
/// <param name = “viewMatrix”>The view matrix.</param>
/// <param name = “projectionMatrix”>The projection matrix.</param>
/// <param name = “offset”>The offset.</param>
public static void DrawWithCustomEffect(Model model,
Matrix world,
Matrix viewMatrix,
Matrix projectionMatrix,
Vector3 offset)
{
var transforms = new Matrix[model.Bones.Count];
model.CopyAbsoluteBoneTransformsTo(transforms);

var translation = Matrix.CreateTranslation(offset);
foreach (var mesh in model.Meshes)
{
foreach (var effect in mesh.Effects)
{
var w = transforms[mesh.ParentBone.Index] * world * translation;

effect.CurrentTechnique = effect.Techniques[“Complete”];
effect.Parameters[“wvp”].SetValue(w * viewMatrix * projectionMatrix);
effect.Parameters[“worldI”].SetValue(Matrix.Invert(w));
effect.Parameters[“worldIT”].SetValue(Matrix.Transpose(Matrix.Invert(w)));

effect.Parameters[“viewInv”].SetValue(Matrix.Invert(viewMatrix));

effect.Parameters[“world”].SetValue(w);

foreach (var pass in effect.CurrentTechnique.Passes)
{
pass.Apply();
mesh.Draw();
}
}
}
}